12 Nov, 2026 | Stephanie Sanders | No Comments
Grow Your Own Pea Shoots: An Inexpensive Way to Add Fresh Nutrition to Your Meals
How to Plant, Harvest, and Regrow Tender Pea Greens at Home
By Stephanie Larmour Sanders, MS, RDN, CDE, FNLP
Anti-Inflammatory Dietitian and Nutritionist
A Small Container Can Produce Something Wonderful
Recently, I planted some seeds in containers in my garden. As the little green plants began growing, I noticed something interesting. At the tops of the plants were delicate, threadlike green structures that looked almost like tiny tassels.
I wondered what their purpose was. I learned that these little structures are called tendrils. They help pea plants climb and support themselves by wrapping around nearby objects. But my goal wasn’t to grow mature pea plants or harvest pea pods.
I wanted to grow fresh, edible pea shoots that I could add to my meals.
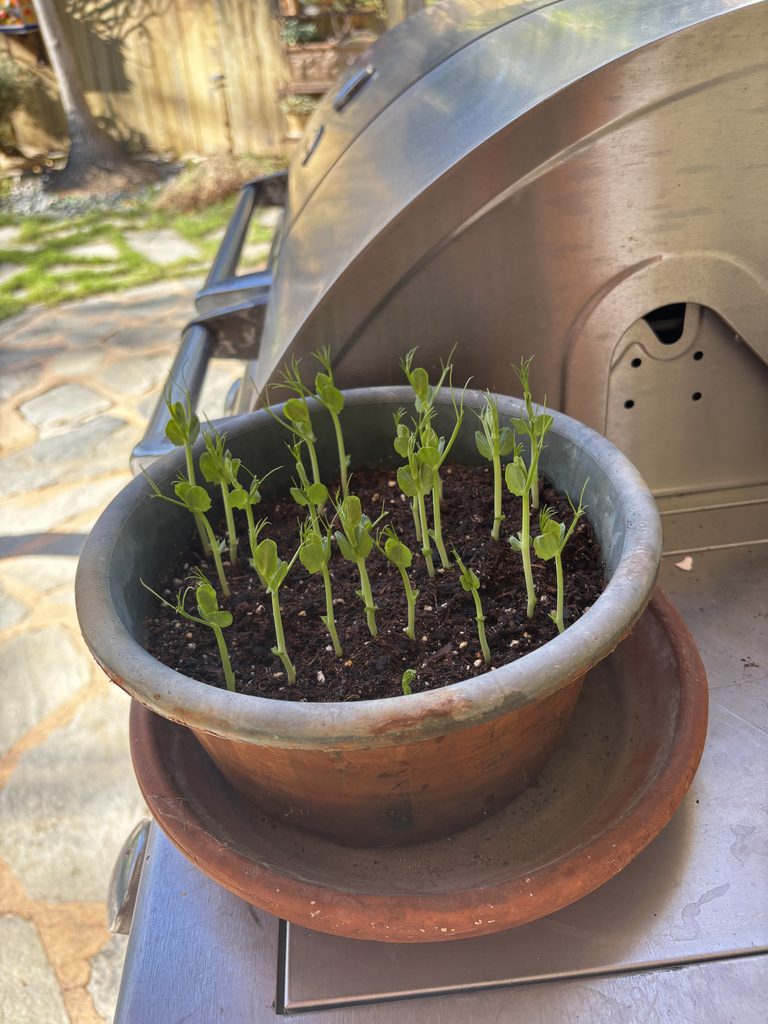
That led to another question: Could I cut off the tender tops, leave the roots growing, and harvest more later? The answer is yes, under the right conditions.
And that is one of the reasons I enjoy growing some of my own food. A small container, a handful of seeds, and a little attention can give us fresh greens without requiring a large garden or expensive equipment.
What Are Pea Shoots?
Pea shoots are the tender young stems, leaves, and tendrils of edible garden peas (Pisum sativum). They are related to the familiar green peas, snow peas, and sugar snap peas we enjoy eating. Pea shoots have a mild, slightly sweet flavor and a delicate texture.
You may see them called pea microgreens, pea shoots, or pea tendrils. Although these terms are sometimes used interchangeably, there are differences:
- Sprouts are germinated seeds generally harvested very young, often with the root and seed attached.
- Microgreens are young plants grown in a medium and cut above the growing surface.
- Pea shoots may be harvested somewhat later, with more developed leaves, stems, and tendrils.
For home gardeners, pea shoots are particularly appealing because you can grow them in a small space and may be able to harvest tender growth more than once.
Why Grow Your Own Pea Shoots?
When I talk about anti-inflammatory nutrition, I encourage people to look for realistic ways to include more colorful plant foods. Growing pea shoots is one example. You don’t need a raised garden bed, expensive equipment, or a large backyard.
You can grow them in:
- Reused food-safe containers with drainage holes
- Small gardening trays
- Pots on a sunny patio
- Containers near a bright window
You may already have nearly everything you need at home.
Growing your own shoots can also help reduce food waste. Instead of purchasing a package of greens and hoping to use it before it spoils, you can harvest a small portion when you need it.
How to Plant Pea Shoots: Step by Step
Step 1: Choose the Right Seeds
- Look for untreated, food-growing seeds labeled for pea shoots, pea microgreens, or edible garden peas. Snow peas and sugar snap peas may also be grown for tender shoots. Avoid ornamental sweet peas (Lathyrus odoratus), which are not edible. It is also important to avoid seeds treated with pesticides or other chemicals not intended for edible sprouts or shoots.
- For repeated planting, purchasing suitable seeds in larger quantities can be less expensive per seed than purchasing several tiny packets.
Step 2: Soak the Pea Seeds
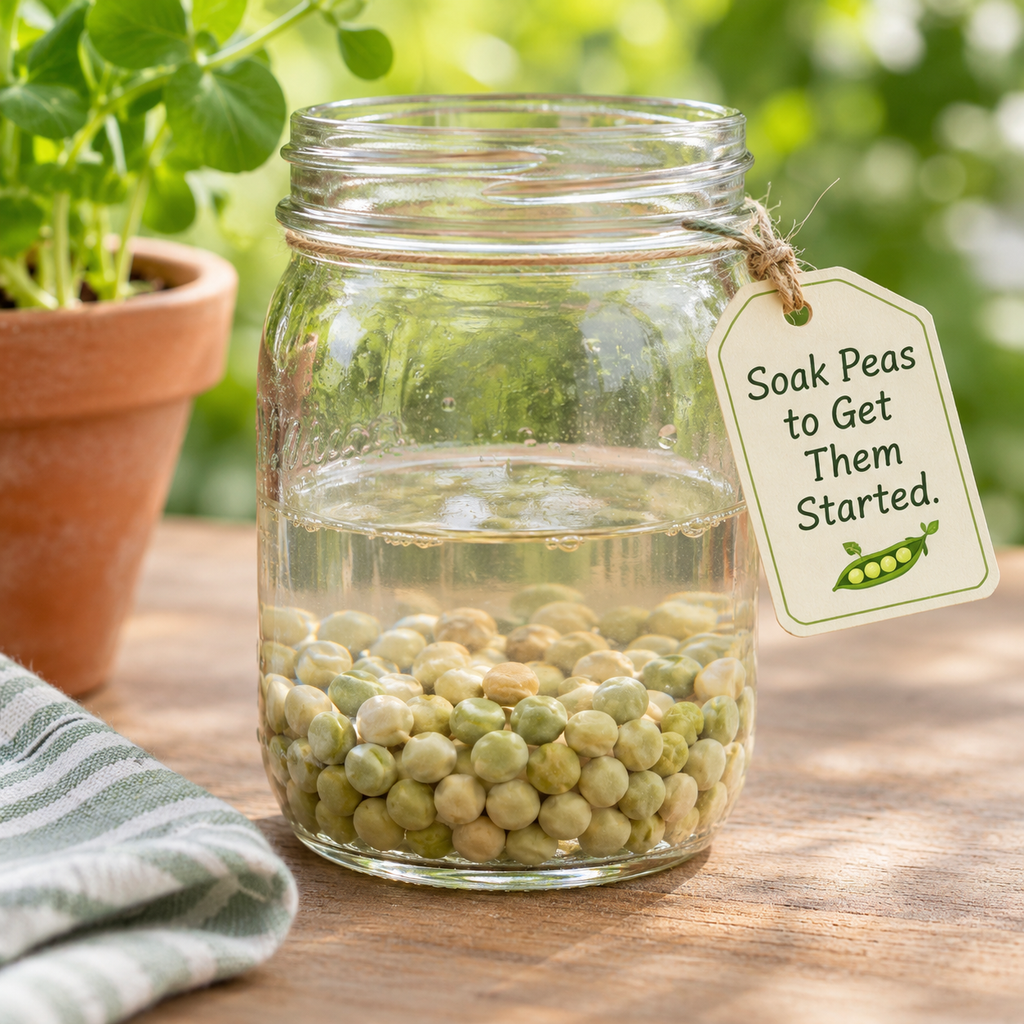
- Place the seeds in a clean container and cover them with drinking-quality water.
- Soak for approximately 8–12 hours to encourage more uniform germination.
- Drain the water afterward.
- The seeds will swell as they absorb moisture, which is a normal part of germination.
Step 3: Prepare Your Growing Container
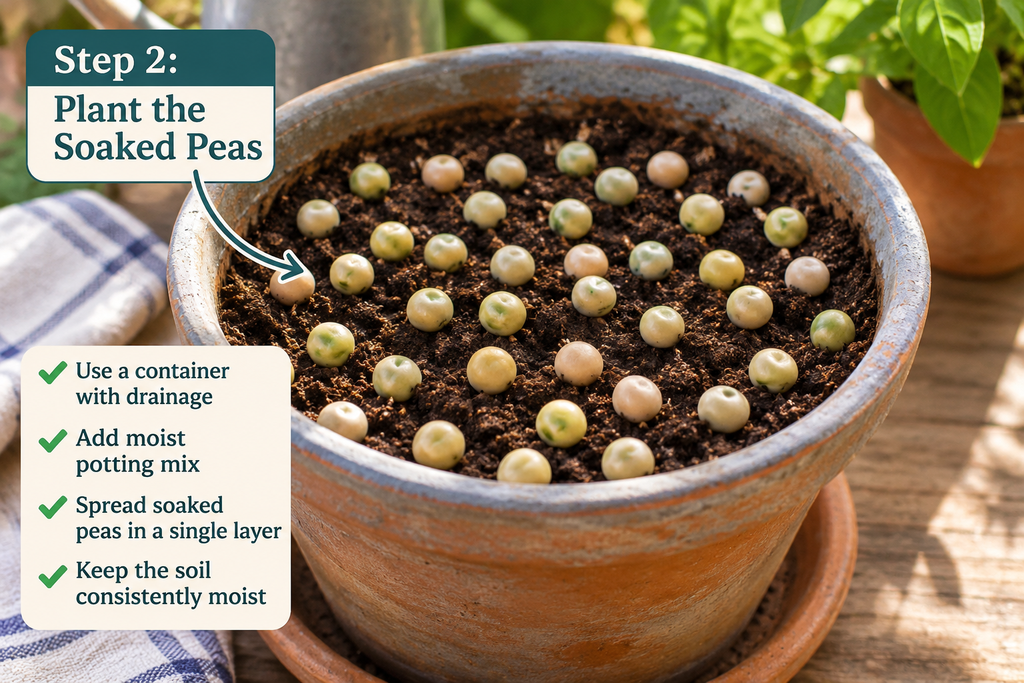
- Choose a clean, food-safe container with drainage holes.
- Add approximately 1½–2 inches of seed-starting mix or another clean growing medium suitable for edible crops.
- Moisten the growing medium before planting. It should feel damp but not waterlogged.
Step 4: Plant the Seeds
- Spread the soaked peas evenly across the growing medium. I actually pushed mine into the dirt, and that works well too.
- You can plant them closer together than you would for mature pea plants because you plan to harvest the young shoots.
- Allow some space between the seeds rather than stacking them on top of one another.
- Gently press the seeds into the growing medium and cover them lightly if recommended for your variety.
Step 5: Support Germination
- Cover the container loosely for the first few days to help maintain moisture.
- Check it daily and remove the cover once the seedlings emerge.
- The growing medium should remain consistently moist, but excessive water can encourage mold and root problems.
Step 6: Provide Light and Airflow
- After germination, move the container to a location with good light.
- A bright window, protected patio, or suitable grow light can work.
- Avoid prolonged intense heat that could dry out or damage the tender seedlings.
- Good air circulation and drainage are important, particularly when seeds are planted close together.
Step 7: Watch Them Grow
- Pea shoots may become ready for their first harvest in approximately 10–20 days, depending on the variety and growing conditions.
- Look for tender green leaves and healthy stems approximately 3–6 inches tall.
- You may also notice the fine green tendrils beginning to form.
- Those tendrils are edible, too.
How to Harvest Pea Shoots
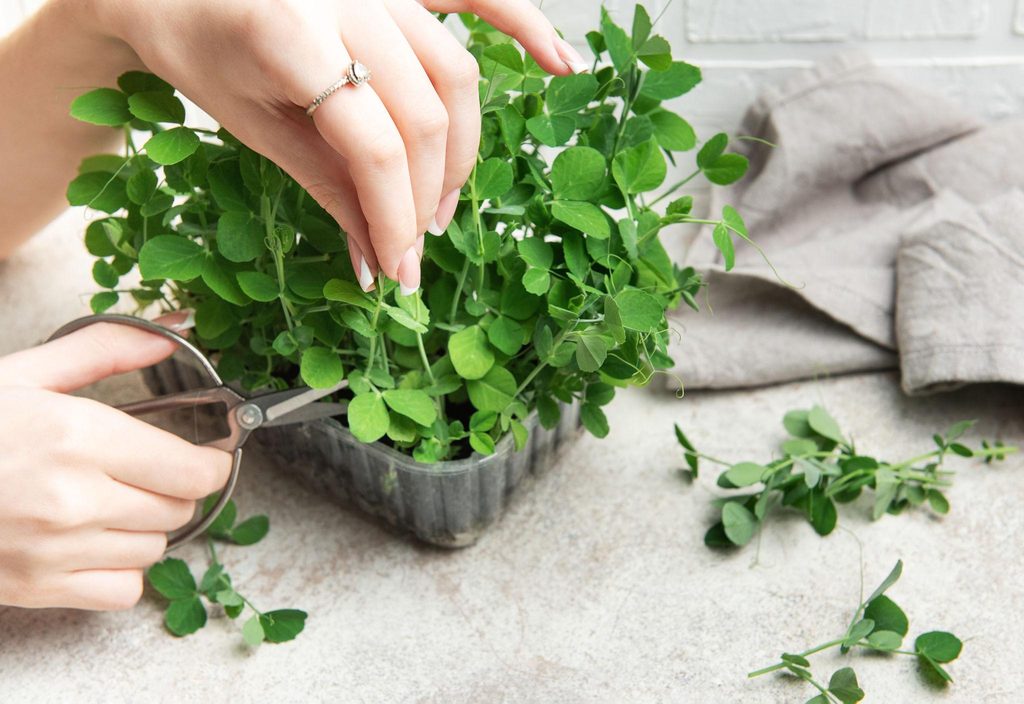
When the shoots reach the size you want, use clean scissors to cut the tender stems. There are two ways to approach harvesting.
Option 1: One complete harvest
- Cut the stems just above the growing medium.
- This is the typical method for growing microgreens commercially or at home.
- It produces one main harvest, after which you begin again with new seeds.
Option 2: Harvesting for regrowth
- If your goal is to obtain additional harvests, cut higher on the plant.
- Leave healthy leaves and growth nodes beneath the cut.
- A node is the area where leaves or branches emerge from the stem.
- These remaining nodes may produce new side shoots.
- Rather than removing the entire plant, you are encouraging it to continue growing.
Can You Harvest the Same Pea Plant More Than Once?
Yes, some pea plants can produce additional tender shoots after their tops are removed. However, regrowth is not guaranteed.It depends on the pea variety, how mature the plant is, how much foliage remains, the growing conditions, and the health of the root system.
To encourage another harvest:
- Cut above a healthy node and leave at least one or two leaf-bearing nodes.
- Keep the roots undisturbed.
- Continue providing adequate light.
- Maintain consistent soil moisture without overwatering.
- Allow new side shoots to develop before cutting again.
Subsequent harvests may be smaller or slower than the first.
If the plants become tough, yellow, diseased, or unproductive, it is better to compost them and start a fresh batch.
My suggestion: Keep one container for regrowth while starting another small container every week or two. This can provide a more dependable supply of fresh shoots.
What Nutrients Do Pea Shoots Provide?
Pea shoots are more than a decorative garnish. These tender greens contain vitamins, minerals, pigments, and phytochemicals that contribute to the nutritional value of plant-rich meals.
| Nutrient or compound | Role in human health |
|---|---|
| Vitamin C | Supports collagen formation, antioxidant defense, and normal immune function |
| Vitamin K | Contributes to normal blood clotting and bone metabolism |
| Beta-carotene and other carotenoids | Support normal vision and antioxidant functions; beta-carotene can be converted to vitamin A |
| Folate | Supports DNA synthesis and cell division |
| Potassium | Important for normal blood pressure regulation, nerve signaling, and muscle function |
| Magnesium | Participates in energy metabolism and normal muscle and nerve activity |
| Iron | Needed to make hemoglobin, which carries oxygen in the blood |
| Polyphenols and flavonoids | Plant compounds studied for antioxidant and cell-signaling activities |
| Chlorophyll | The green pigment that allows plants to capture light for photosynthesis |
| Fiber | Contributes to digestive health, although a small serving of pea shoots provides only a modest amount |
Actual amounts vary according to variety, growing medium, light exposure, harvest age, and storage conditions.
What Does the Research Tell Us?
A 2025 study evaluating the nutritional profiles of six microgreens, including pea microgreens, found that these young plants provided vitamin C and a range of minerals.
Across all six types studied, vitamin C ranged from approximately 33 to 80 milligrams per 100 grams of fresh microgreens.
The researchers also identified potassium, magnesium, calcium, iron, zinc, and other minerals.
These findings demonstrate the nutritional potential of microgreens, although the nutritional composition of one type should not be assumed to apply to every variety.
Because we generally eat pea shoots in relatively small portions, they are best viewed as a nutritious addition to meals rather than a replacement for vegetables, legumes, or other important food groups.
Do Pea Shoots Have Anti-Inflammatory Benefits?
This is where I like to distinguish between what a food contains and what scientific research has demonstrated.
Across all six types studied, vitamin C ranged from approximately 33 to 80 milligrams per 100 grams of fresh microgreens. Oxidative stress and inflammation are closely connected biological processes, but they are not identical.
Laboratory research suggests that some compounds found in plant foods may influence inflammatory signaling pathways.
However, we do not have sufficient clinical evidence to conclude that eating a particular serving of pea shoots will directly reduce chronic inflammation or treat an inflammatory condition.
What we can say is that pea shoots offer another way to increase the variety of plant foods in an overall balanced eating pattern.
And that is a practical goal worth pursuing.
An Inexpensive Way to Grow Fresh Nutrition
One reason I enjoy this gardening project is that it doesn’t require a major financial investment. You can use a container you already own, provided it is clean, food-safe, and has drainage holes. You can also reuse suitable trays for future planting.
The main ongoing costs are seeds, growing medium, water, and any additional lighting you may need.
Here are my suggestions for keeping expenses down:
- Reuse containers. Clean, food-safe containers can eliminate the need to purchase special growing trays.
- Buy suitable seeds economically. Larger seed packages may offer a lower cost per planting, but only buy quantities you can use while the seeds remain viable.
- Use natural light when practical. A bright window or suitable outdoor location may eliminate the need for an additional grow light.
- Plant small batches. Growing only what you expect to eat can reduce waste.
- Experiment with regrowth. Leaving healthy nodes may give you an additional harvest without using more seeds.
- Stagger your planting. Start another container before the first is finished to maintain a more consistent supply.
It is important to recognize that homegrown greens are not automatically cheaper than every store-bought option. The savings depend on seed prices, growing materials, yield, and how frequently you harvest. But for someone who enjoys gardening and frequently uses fresh greens, this can be a practical and satisfying approach.
Five Simple Ways to Eat Your Homegrown Pea Shoots
I like foods that are easy to incorporate into meals I already prepare.
Here are five possibilities:
- Add them to a quinoa bowl. Combine freshly harvested pea shoots with cooked quinoa, olive oil, and vegetables.
- Stir them into eggs. Briefly cook the shoots with scrambled eggs or an omelet.
- Add them to soup. Stir them into a hot vegetable or chicken soup near the end of cooking.
- Use them in a vegetable sauté. Lightly sauté pea shoots with olive oil and other vegetables.
- Add them to a grain-and-protein bowl. Pair them with chicken, salmon, or another preferred protein.
If you have digestive sensitivities, begin with a small portion and observe your tolerance.
A Note About Food Safety
Homegrown microgreens are still a raw agricultural food and require careful handling. Warm temperatures, moisture, contaminated seeds, and poor growing conditions can allow harmful microorganisms to multiply.
- Use clean containers, drinking-quality water, and untreated seeds intended for edible crops.
- Wash harvested shoots under clean running water and refrigerate promptly if you are not using them immediately.
- Discard shoots that show mold, sliminess, decay, or unusual odors.
- Washing does not eliminate every food-safety risk, and dangerous bacteria may be present without obvious signs. Cooking pea shoots thoroughly provides additional protection, especially for pregnant people, older adults, young children, and people with weakened immune systems.
Stephanie Says: Small Gardens Can Teach Us Big Lessons
I enjoy observing what happens when we plant something and give it the opportunity to grow.
Your Seven-Day Pea Shoot Detective Challenge
This week, try beginning your own small growing experiment.
- Day 1: Choose a container and suitable edible pea seeds.
- Day 2: Prepare your growing medium and plant the soaked seeds.
- Day 3: Check moisture and observe the first signs of germination.
- Day 4: Watch for developing roots and shoots.
- Day 5: Check light exposure and airflow.
- Day 6: Observe the developing leaves and stems.
- Day 7: Record your progress and plan when your first harvest may be ready.
Your plants may not be ready to eat after seven days. That’s fine. The goal is to learn how they grow.
Want to Learn More About Anti-Inflammatory Nutrition?
In my course, Detecting and Reducing Pro-Inflammatory Lifestyle Factors in 30 Days, I teach a practical framework for recognizing lifestyle patterns and making informed changes.
I can hand you the flashlight. My course teaches you to be the detective.
Learn more at StephanieLarmour.com.
References and Further Reading
- Penn State Extension. A Step-By-Step Guide for Growing Microgreens at Home.
- Oregon State University Extension. Microgreens.
- University of Maryland Extension. Growing Microgreens and Baby Greens Indoors.
- Clemson University Cooperative Extension. Growing Microgreens.
- Nutritional Quality Profiles of Six Microgreens. 2025. PubMed Central, PMCID: PMC11842852.
- University of Connecticut Extension. The Amazing Power of Microgreens: Easy to Grow and a Superfood.
Write Reviews
Leave a Comment
No Comments & Reviews